How to extend C drive without losing data?
When system C drive is full or running out of space, you can extend partition by shrinking other drives, no need to start from scratch. However, many people do not know how to extend C: drive or system partition, so here I want to give complete solution and detailed steps of how to extend C drive in Windows 10/8/7/Vista/XP and Server 2016/2012/2008/2003 (R2).
Before doing this, I suggest read more about free space in a hard disk drive, so you’ll understand how to extend drive easier.
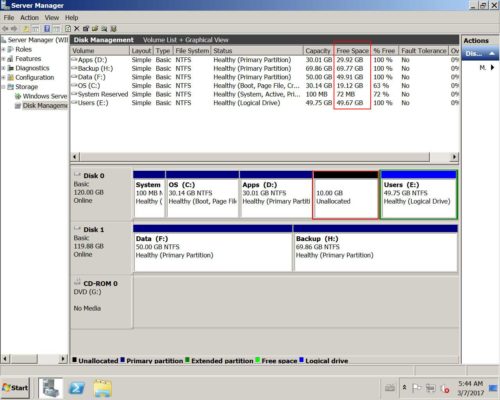
Introduction of free space in a disk
Free space is either called Unallocated or unused space.
Unallocated space is logical space on a hard disk drive that the operating system can write to. To put it another way it is the opposite of “allocated” space, which is where the operating system has already written files to.
If the operating system writes a file to a certain space on the hard drive that part of the drive is now “allocated”, as the file is using it the space, and no other files can be written to that section. If that file is deleted then that part of the hard drive is no longer required to be “allocated” it becomes unallocated. This means that new files can now be re-written to that location.
Unused space is blank area in a single drive that can be used to store files. In short, if the free space does not belong to any drive, it is Unallocated space, otherwise, it is unused space.
How to extend C drive with free space
As long as there is free space in the same disk, you can easily extend C drive, no matter it is Unallocated or unused space. Please note: only free space in the same disk can be used to extend C drive. No software can resize partition beyond physical hard disk.
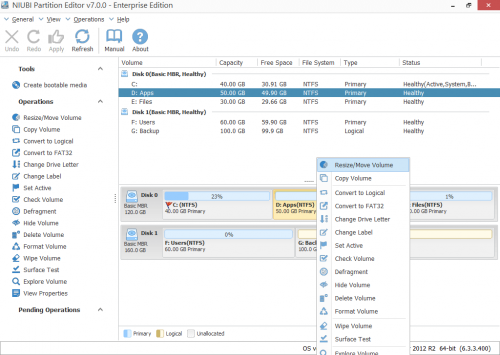
Step 1: Download NIUBI Partition Editor, right click D: drive and select “Resize/Move Volume“.
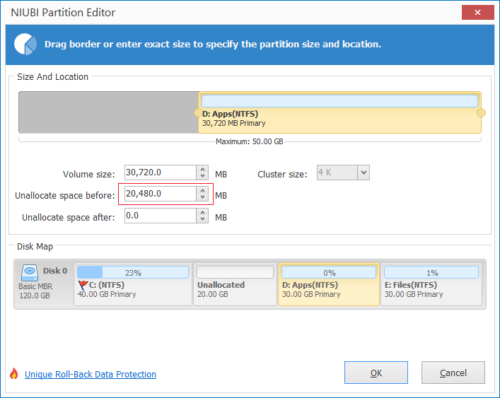
Step 2: In the pop-up window, drag the left border rightwards to generate free Unallocated space.

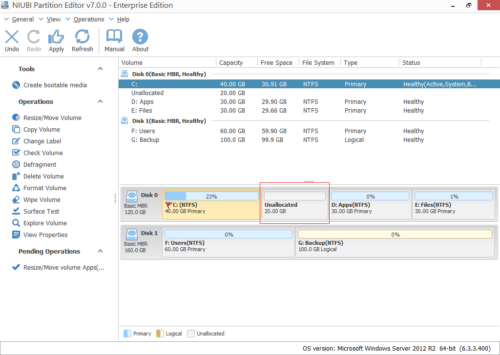
Click OK and back to the main window, where 20GB Unallocated space created behind C: drive.
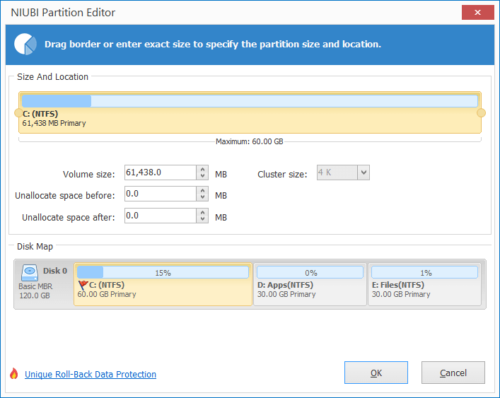
Step 3: Right click C drive and select “Resize/Move Volume” again, in the pop-up window, drag the right border rightwards to hold the Unallocated space.

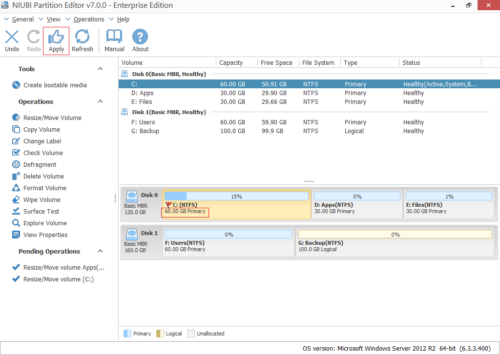
Click OK and back to the main window, where C drive extended to 60GB by holding the 20GB free space from D. Press Apply on top left to execute, done!

