How to extend system partition in Windows Server 2012 R2
Unlike other volumes, system partition C is very likely running out of space, because many files are saving to it continuously. When it happens, nobody likes to start over. Instead, you can extend system partition in Server 2012. It is not an easy task to many server administrators if there’s no such experience. To extend system partition C: in Windows Server 2012 r2, the first thing is making a backup and run safest tool. Nobody likes to see system failure or data loss after doing this.
To extend system partition in Windows 2012 server, native Disk Management is an option, but it is not the best because of many restrictions. In this article, I’ll introduce how to extend system partition in Windows Server 2012 R2 with Disk Management and safest partition software. Select the tool and method according to your own disk partition configuration.
Extend system partition with Disk Management
The same with previous version, Windows Server 2012 has “Extend Volume” function built in Disk Management. From Microsoft document, to expand a drive with this tool, there must be adjacent Unallocated space on the right side. That means, you cannot extend system partition by shrinking other volume with Disk Management. Although there’s another “Shrink Volume” function, it can only make unallocated space on the right when shrinking a partition. For example: if you decrease D drive with “Shrink Volume”, unallocated space will be made on the right of D. This space is nonadjacent to C drive. Therefore, “Extend Volume” option is grayed out.
If you cannot install third party software to your server or insist on using Windows native tool, the only way is deleting the adjacent partition. Furthermore, your disk partition configuration must meets all requirements below. Otherwise, this method is invalid.
- There’s a partition with plenty of free space on the right of C drive.
- There are no programs or Windows services installed in this partition, so you can delete it to get contiguous unallocated space.
- This contiguous partition is primary, otherwise, Extend Volume is still disabled even after deleting this partition.
If your disk partition structure meets the requirements and you can delete partition, follow the steps below, otherwise, jump to the next section.
How to extend system partition in Server 2012 r2 via Disk Management:
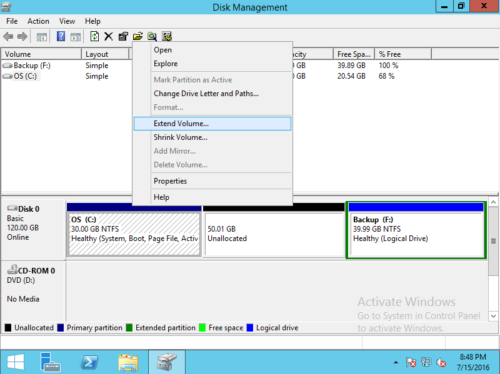
Step 1: Transfer all files in the contiguous partition (here is E:) to other place. Right click this partition in Disk Management and select “Delete Volume…”, it will be changed to unallocated after deleting.
Step 2: Right-click system partition C: and select “Extend Volume…”
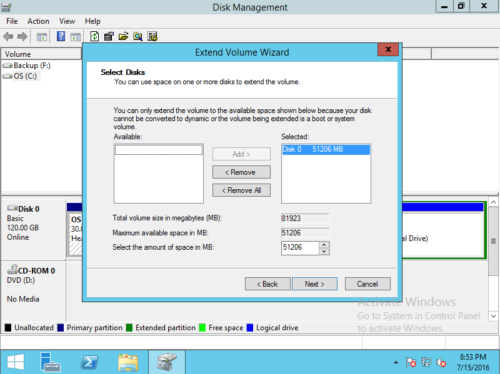
Step 3: Available Unallocated space is selected by default, simply click Next to continue.
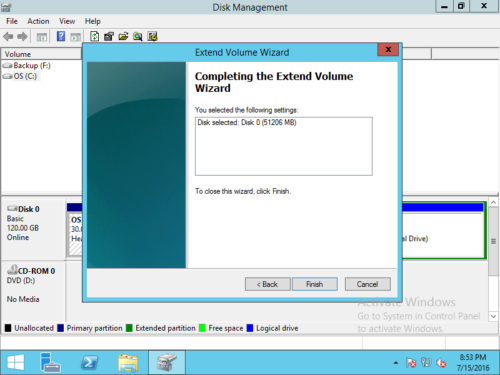
Step 4: Click Finish to confirm and start extending.
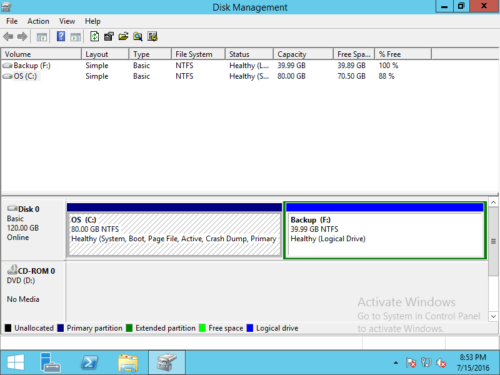
In a short while, system C: drive is extended by adding disk space of E drive.
Extend system drive with safe partition software
Unlike Windows Disk Management, NIUBI Partition Editor can shrink partition and make unallocated space on the left, then C drive can be extended easily. In this way, your operating system, programs and anything else (except partition size) keep the same with before. To increase system partition size in Windows Server 2012 with NIUBI, you just need to drag and drop on the disk map.
Most of server administrator know the importance to back up server before any operation. But if system or partitions are damaged by unreliable software, it still costs a long time to restore and verify data. Better than other tools, NIUBI Partition Editor has powerful 1-Second Rollback technology to protect your system and data. If it detects any error while shrinking and extending partitions, it automatically reverts server to original status in a flash.
To ensure 100% safety and fast recovery. This tool can clone disk partition in Windows without server interruption. So you can clone system disk before any operations or regularlly. If system disk goes wrong, you can boot from the clone disk immediately.
Another major benefit is that it saves much time. Because of its special file-moving algorithm, it is 30% to 300% faster when shrinking, moving and copying partitions. This ability is very helpful to a server especially when there are large amount of files and the operation requires server rebooting to execute.
Steps to extend system partition in Windows Server 2012 r2 with NIUBI:
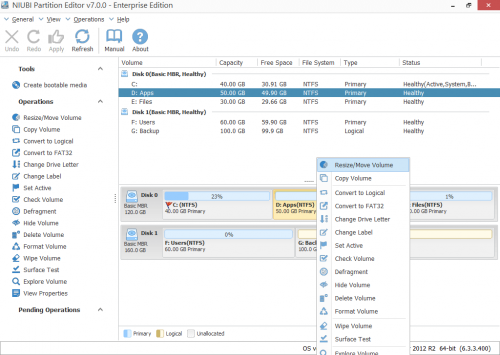
Step 1: Download this tool, right click the adjacent drive (here is D:) and select “Resize/Move Volume“.
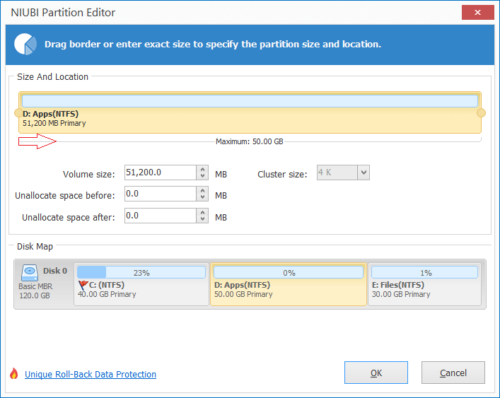
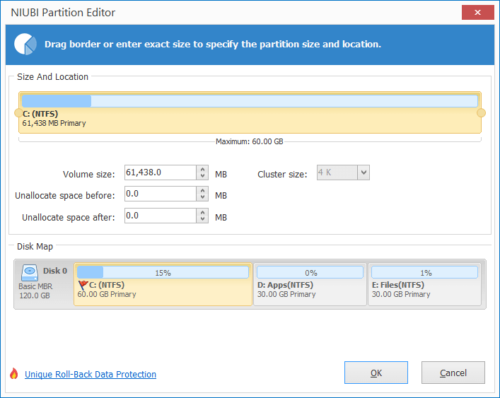
Step 2: In the pop-up window, drag the left border rightwards to shrink this partition and make unallocated space on the left. (Another option is entering an amount behind “Unallocated space before”.)
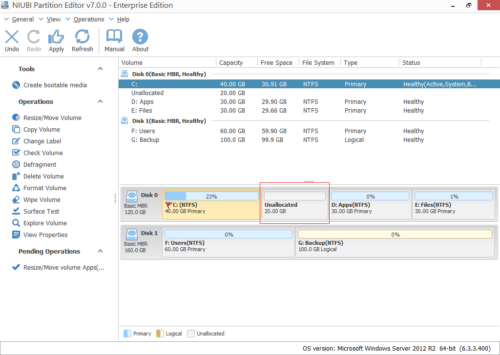
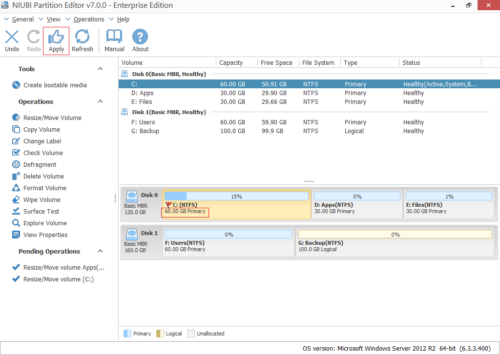
Click OK and back to the main window. Unallocated space is made in virtual mode and there’s a pending operation listed on bottom left.
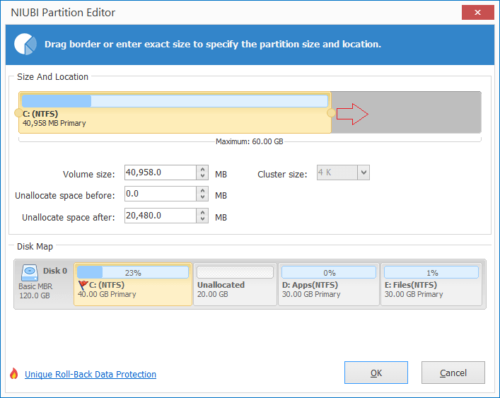
Step 3: Right click system partition C and run “Resize/Move Volume” again, drag the right border rightwards to merge this adjacent unallocated space.
Step 4: Click OK and back to the main window, click Apply on top left to execute, done!
If you want to shrink the nonadjacent partition E to extend C drive, there’s an additional step to move D drive to the right and make unallocated space next to C drive.
How to extend system partition in Server 2012 R2:
If there’s no other volume on the same disk, no software can extend system volume by adding space from a separate disk. In that case, you can copy system disk to a larger one and extend partition with extra disk space. If you use any types of hardware RAID arrays, do not break array or do any operations to RAID controller. If you run Server 2012 as guest virtual machine in VMware/Hyper-V, simply follow the same steps above.

