How to extend partition in Server 2012 R2
Although Windows Server 2025 will be released soon, Windows Server 2012 is still used by many people and companies. The longer server is running, the less free space is left in C drive. When it happens, you can shrink a partition to release free space, and then add to the partition that is getting full. To extend partition in Server 2012 R2, inbuilt Disk Management is an option. But because of some shortages, it is not the best choice. Although Disk Management has “Extend Volume” function, it is useless in most of the cases. In this article I’ll introduce how to extend partition on Windows Server 2012 R2 with Disk Management and safe partition software.
- Part 1 – Expand volume under Server 2012 Disk Management
- Part 2 – Extend partition with disk partition software
Part 1 – Expand volume under Disk Management
It is not difficult to extend partition with Disk Management when there’s adjacent unallocated space. The problem is, you can’t get such adjacent unallocated space by shrinking any partition. If you don’t want to use any software, you must delete the adjacent partition on the right at first. If there’s no such partition or if you cannot delete it, Disk Management is useless. In that case, jump to the next section with disk partition software.
Steps to extend partition in Server 2012 R2 with Disk Management:
Step 1: Right click “Windows” on the bottom left corner in Server 2012 desktop and select “Disk Management” and then the console will be opened.
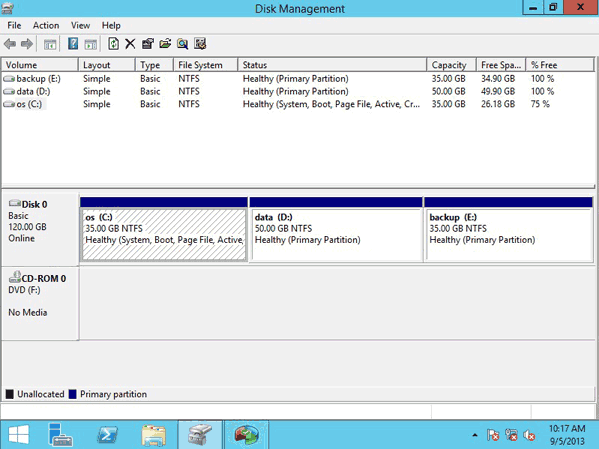
Step 2: Right click the NTFS partition that has adjacent unallocated space and select “Extend Volume“.
Step 3: Simply finish the pop-up “Extend Volume Wizard” via several clicks.
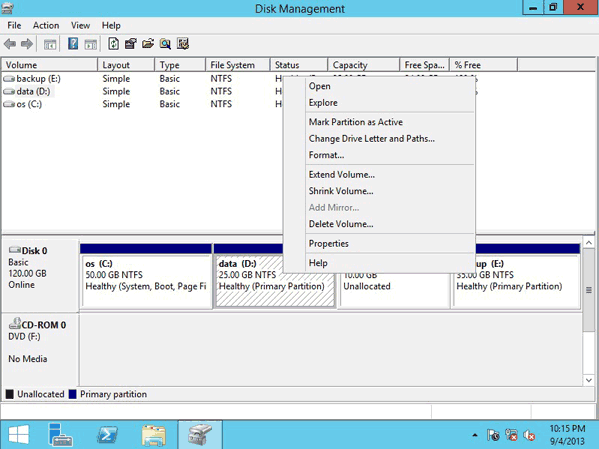
Please compare the following two screenshots carefully.
VS
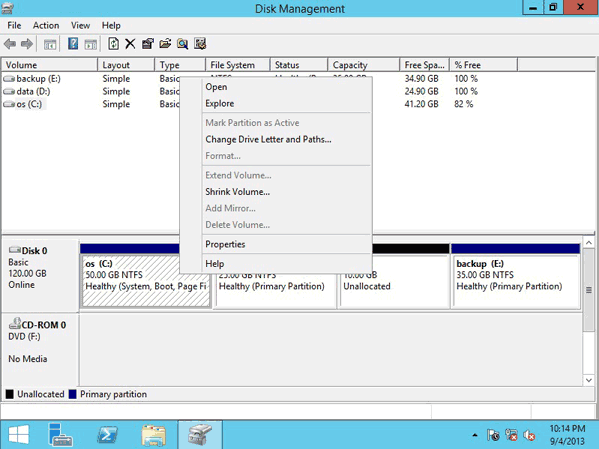
Have you found out the difference? When I right click drive D in the first screen shot, “Extend Volume” is available. But “Extend Volume” is grayed out when I right-click the C drive. As I explained above, to extend a partition with Disk Management, there’s must be adjacent unallocated space. If you want to extend C drive in Server 2012 without software, you must delete D at first.
There’s one more point you should know, the partitions to be deleted and extended must be the same primary or logical drive. Because C drive is primary, D drive must be primary, too. Otherwise, you still cannot extend C drive with Disk Management after deleting D.
Part 2 – Extend partition with disk partition software
With disk partition software, there are no such limitations. As long as there’s another partition on the same disk, you can shrink it to extend another one. No matter these partitions or NTFS or FAT32, primary or logical. After extending partition by shrinking another one, operating system, programs and anything else keep the same with before.
Steps to extend partition in Windows Server 2012 R2 without losing data:
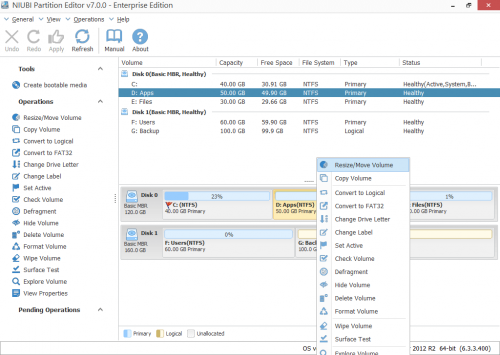
Step 1: Download Partition Editor Server, right click D: drive and select “Resize/Move Volume“.
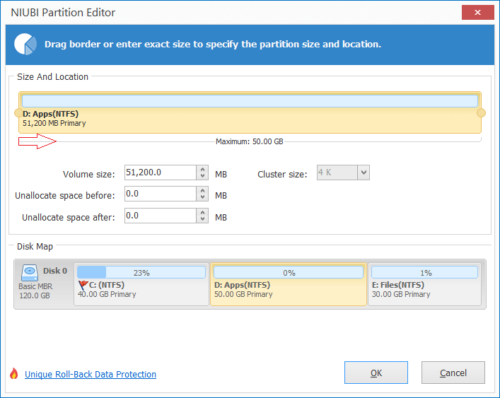
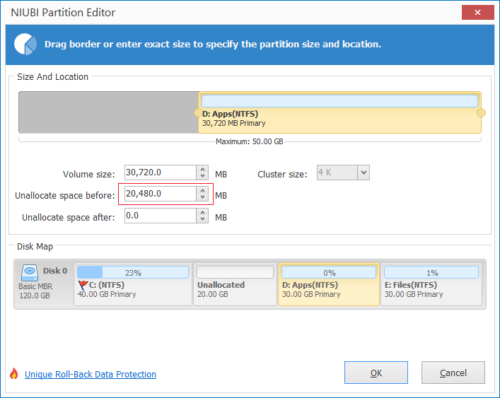
Step 2: In the pop-up window, drag the left border rightwards to generate free Unallocated space.
You may also input a value for the Unallocated space directly.
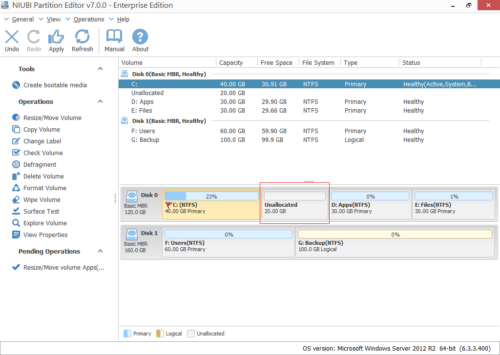
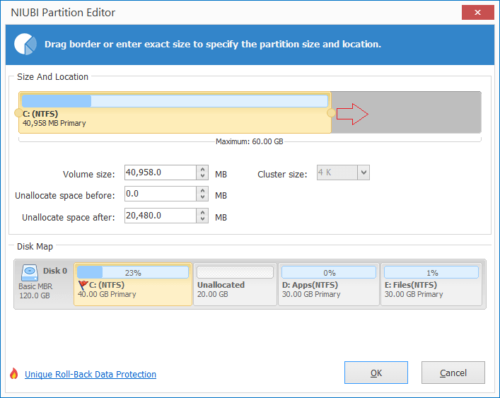
Click OK and back to the main window, where you’ll see 20GB Unallocated space created behind C: drive.
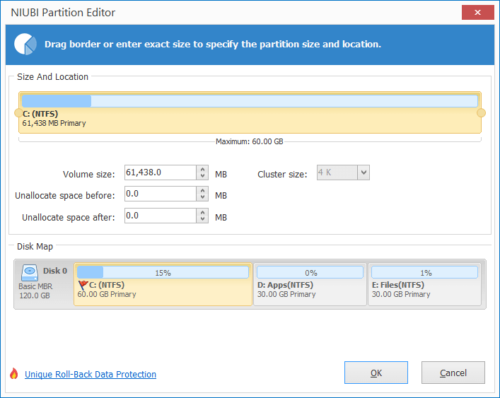
Step 3: Drag the right border rightwards to hold the Unallocated space.
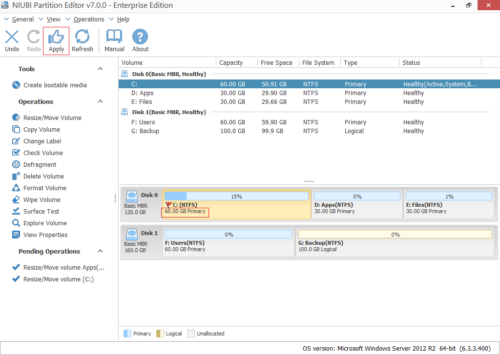
Step 4: Click OK and back to the main window, where you’ll see C drive extended to 60GB by robbing 20GB free space from D. Press Apply on top left to execute, done!
Video guide to extend volume on Server 2012 R2
NIUBI Partition Editor has unique 1-Second rollback protection technology, which is able to revert server to original status automatically and rapidly if any error is detected. It is able to clone disk partition in Windows without server interruption. You can clone system disk before any operations or as regular backup. Furthermore, it is 30% – 300% faster than any other tools because of its unique file-moving algorithm.

