How to extend volume in Windows Server 2012 r2
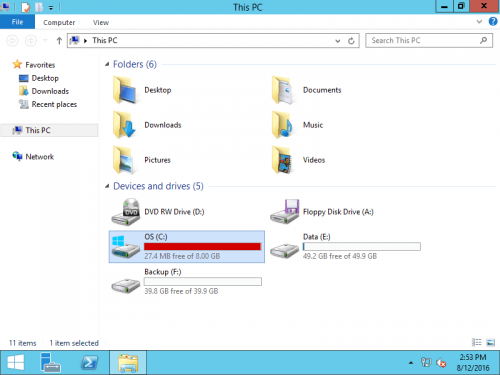
Many server administrors encountered the issue that C: drive is getting full and changed to be red. What will you do in this situation, recreate all partitions and restore everything from backup? Nobody wants to do like this. It is critical issue when C drive is full, therefore you’d better fix as fast as possible.
The fastest and easiest way to solve this problem is extending C: drive by shrinking other volume.
Overview:
Benefits to extend partition for Server 2012
When C drive is getting full, you can increase C drive space without losing programs and data. Shrink a data volume to release free space and then transfer to C drive. In this way, you can solve this problem fast and easily. Operating system, program and anything else keep the same with before. It costs such a long time if you recreate partition, restore everything from backup and verify data. To extend partition in Server 2012 R2, there are 3 kinds of tools. In this article, I’ll introduce how to extend volume in Windows Server 2012 R2 with these tools step by step.
3 Methods to extend volume in Windows 2012 server
To extend partition in Windows Server 2012 r2, there are 3 kinds of tools: diskpart, Disk Management and disk partition software.
- Diskpart has been added from Server 2003. It works from command prompt and is able to do basic and advanced partition management operations such as shrink and extend volume. However, command prompt is not easy to use for many computer users.
- From Windows Server 2008, Microsoft added new “Shrink Volume” and “Extend Volume” functions in Disk Management with graphic interface. However, the same with diskpart, Disk Management has many restrictions when resizing partitions. You’ll encounter many problem when extending partition in Windows server.
- Disk partition software is much more powerful than the native tools. However, there’s potential system/partition damage risk with unreliable software. Therefore, you’d better make a backup in advance and run the safest partitioning software.
Way 1 – extend Server 2012 partition with Diskpart cmd
- Press Windows and R to open Run, type CMD and press Enter.
- Type Diskpart in the command prompt window.
- Type list disk, press Enter, and then type list partition. (This operation is to view your existing disks and partitions.
- Type select disk 0, then select partition 1 (Select the disk volume to work on, typically this should be disk 0 and partition 1)
- Type extend size=XX (XX is the amount of space, 1024MB=1GB, if you do not specify the size, the command will extend partition with all available space.)
Note: this method only works when you delete the adjacent partition on the right to extend partition on the left. For example: before extending C drive in Server 2012, you must delete the contiguous partition D in advance.
Way 2 – extend Server 2012 volume with Disk Management
As I said above, Disk Management and diskpart work in different way, but they have same restrictions. Before extending a partition, you also need to delete the adjacent partition on the right. Furthermore, the 2 partitions must be the same primary or logical. If you don’t want to delete partition or if your partition layout doesn’t meet the requirements, jump to the next section.
How to extend volume in Windows Server 2012 R2 with Disk Management:
- Move all files in the contiguous partition on the right (such as D:) to other place.
- Press Windows + X keys together and click Disk Management in the list.
- Right click the partition on the right (such as D:) and select “Delete Volume”.
- Right click the partition on the left (such as C:) and select “Extend Volume”. Follow up the wizard.
Way 3 – extend partition in Server 2012 r2 with safe software
With server partition software, you can shrink D drive and make unallocated space on the left. So C drive can be extended easily without deleting any partition. Operating system, programs and anything else keep the same with before. However, as I said above, there’s potential system and partition damage risk with unreliable software. You’d better back up server in advance and run safe tool.
Better than other software, NIUBI Partition Editor has unique 1-Second Rollback technology. If it detects any error when resizing partitions, it automatically reverts server to original status in a flash. To avoid mistake, it is designed to work in virtual mode. It lists all operations as pending for preview and real disk partitions won’t be changed until click “Apply” to confirm. Furthermore, it is able to clone disk partition in Windows without server interruption. Another major benefit is that it is much faster. NIUBI’s special file-moving algorithm helps shrink, move and copy partition 30% to 300% faster. This is very helpful to save time.
How to extend partition in Windows Server 2012 R2 without losing data:
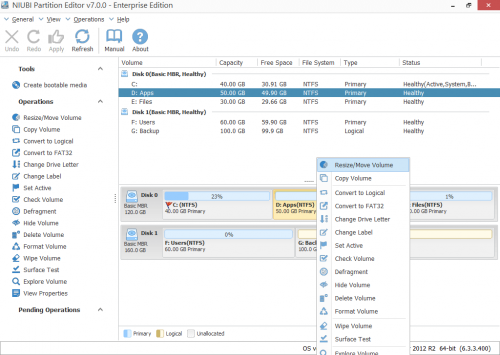
Step 1: Download NIUBI Partition Editor, right click D: drive and select “Resize/Move Volume“.
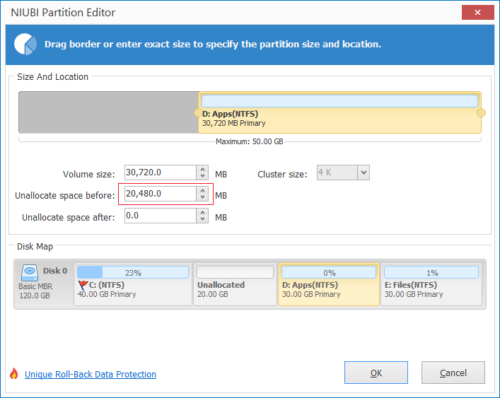
Step 2: In the pop-up window, drag the left border rightwards to shrink this partition and make unallocated space on the left.

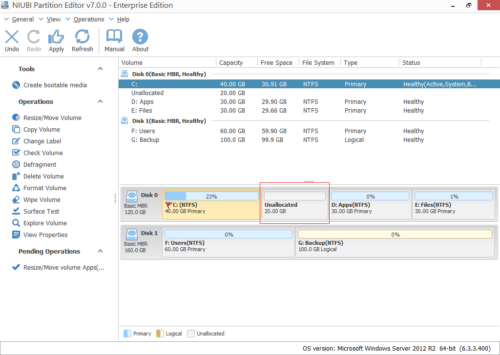
Click OK and back to the main window, 20GB unallocated space is made in virtual mode and there’s a pending operation listed on bottom left.
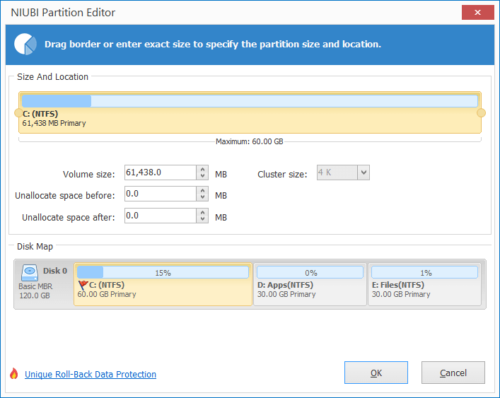
Step 3: Right click C drive and select “Resize/Move Volume” again. In the pop-up window, drag the right border towards right to merge this unallocated space.

Step 4: Click OK and back to the main window. C drive is extended to 60GB in virtual mode. Press Apply to take effect, done!
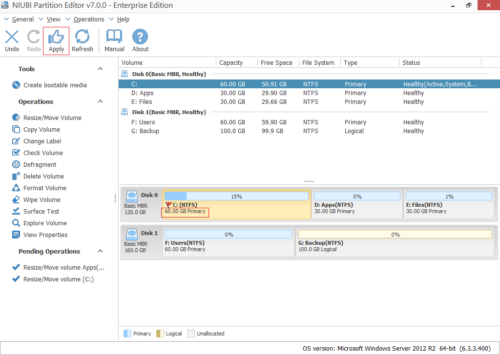 To shrink, extend and move partitions, you just need to drag and drop on the disk map. Internal and removable SSD/HDD, all types of hardware RAID array, VMware/Hyper-V virtual machines, USB flash drive and memory cards are all supported.
Video guide to extend volume on Server 2012 R2
Beside extending partition in Windows Server 2012/2016/2019/2022/2025 and previous Server 2003/2008 (R2), NIUBI Partition Editor helps you do many other disk partition management operations.

