How to extend boot partition in Windows Server 2016
The same with other version, boot partition C running out of space is common issue in Windows Server 2016. Windows updates, applications, temp files, caches and many types of files can easily eat up the free space quickly. When C drive is getting full, it changes to be red in File Explorer. You may also receive “low disk space” alert. When it happens, you can shrink other volume to extend boot partition in Windows Server 2016. It is much easier and faster than recreating partitions and restoring everything from backup.
Tools to extend boot partition in Windows 2016 server
To resize/extend boot partition in Windows Server 2016, there are two choice: Windows built-in Disk Management and third party partition software. Disk Management has “Extend Volume” function to help increase partition size. However, it only support NTFS partition, other types of partitions can’t be resized. Another major shortage is that it cannot extend boot partition by shrinking other one. Your disk partition layout must the all requirements below:
- There’s a contiguous partition behind, and you must delete it to get adjacent unallocated space.
- This contiguous partition must be primary.
If your disk partition layout doesn’t meet the requirements, don’t waste time and jump to the next section.
How to extend boot partition in Server 2016 via Disk Management:
- Press Windows + X keys together and then click Disk Management.
- Right click the contiguous partition D (or E) and select “Delete Volume”.
- Right click the boot partition C and select “Extend Volume”.
- Follow up the pop-up “Extend Volume Wizard”.
Note: do not delete partition if there are programs in it. If you can delete it, transfer files in advance.
Learn why you cannot extend C drive in Server 2016 with Disk Management by shrinking other volume. If your partition layout doesn’t meet the requirements or if you don’t want to delete partition. Follow the method below.
Extend boot drive in Server 2016 with safe partition software
With third party software, you can shrink D (or E) drive and make unallocated space on the left, then C drive can be extended easily. You can even shrink nonadjacent partition to get unallocated space. In addition, the partition to be shrunk could be either primary or logical. In this way, you can change partition size without losing partition or programs. Everything keeps the same with before.
Because there’s potential system/partition damage risk, you’d better back up server in advance and run safe partition software. Better than other tools, NIUBI Partition Editor has unique 1-Second Rollback technology. If it detects error when resize partition, it can revert server to original status in a flash automatically. Furthermore, it has Virtual Mode and Cancel-at-well technology to avoid wrong operations. Hot Clone technology helps you clone disk partition in Windows without server interruption. Furthermore, it saves much time to shrink and move partition because of its special file-moving algorithm.
How to extend boot partition C in Windows Server 2016 without losing data:
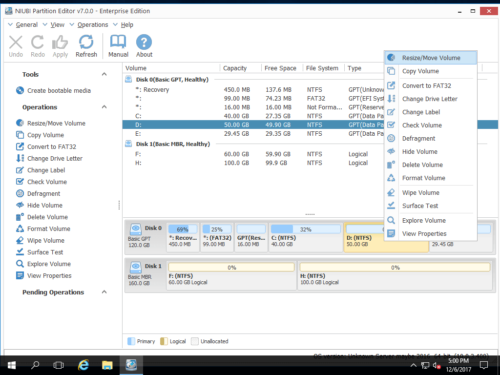
Step 1. Download and install NIUBI Partition Editor, right click volume D and select “Resize/Move Volume“.
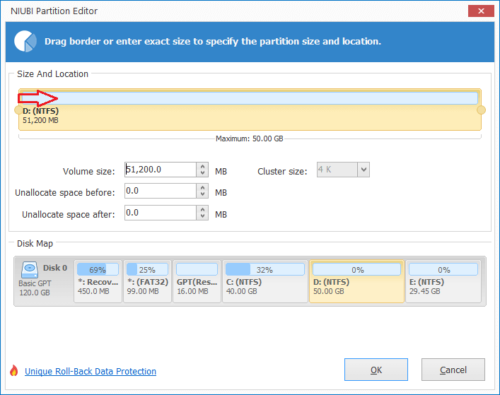
Step 2: In the pop-up window, drag left border rightwards to shrink it and make Unallocated space on the left.

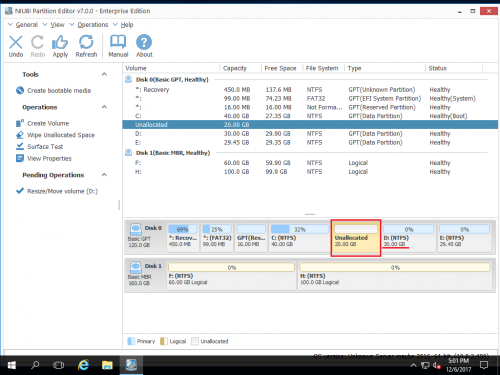
Click OK and back to the main window, Unallocated space is made behind C drive and a pending operation is listed.
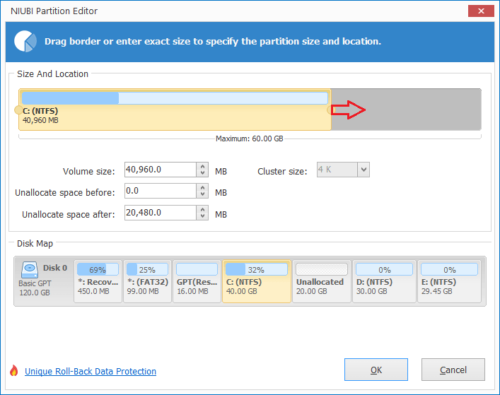
Step 3: Right click C drive and select “Resize/Move Volume” again. In the pop-up window, drag the right border rightwards to merge this Unallocated space.

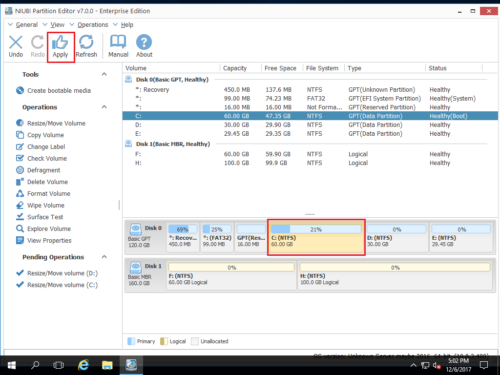
Step 4: Click OK and back to the main window, C drive is extended in virtual mode. Click Apply to take effect, done.
Video guide to extend boot partition in Windows Server 2016
Besides shrink and extend boot partition in Windows Server 2016/2019/2022 and previous Server 2003/2008/2012, NUIBI Partition Editor helps to clone disk/partition, convert disk/partition type, scan bad sectors, move, merge, defrag, wipe partition and much more.

