How to shrink C drive in Windows Server 2016
When installing Windows Server 2016, if you forget to create partitions, all disk space will be used by C: drive. It is bad idea to keep single C drive and save everything into it. You’d better create more partitions to save different types of filess. To do this, you can shrink C drive without losing data. Sometimes you may need to extend system reserved partition, then you should decrease C drive or other partition.
To shrink C: drive in Windows Server 2016, you may use either Windows built-in utility or third party software. Windows built-in Disk Management has “Shrink Volume” function to decrease partition size. However, it cannot shrink C drive in some cases. In this article, I’ll introduce how to shrink partition C in Windows Server 2016 with Disk Management and safe partition software.
How to shrink C drive in Server 2016 with Disk Management
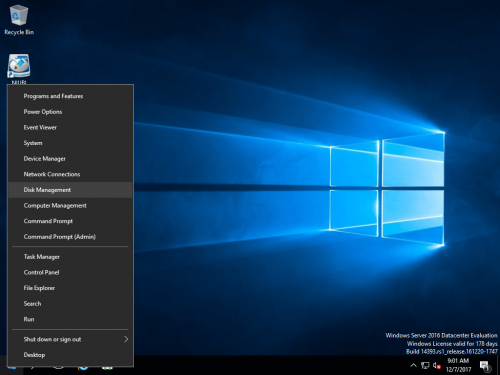
Step 1: Right click Windows on bottom left and then click Disk Management.
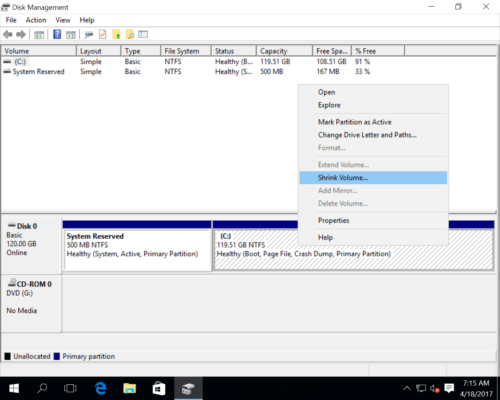
Step 2: Right click C: drive and select Shrink Volume.
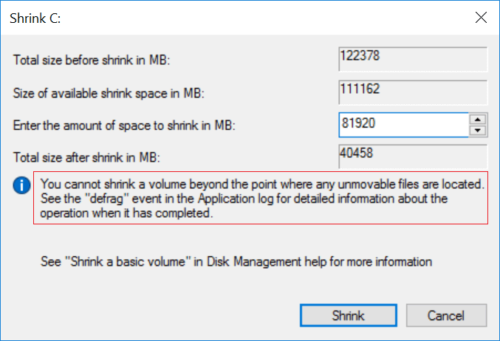
Step 3: Enter the amount of space and click “Shrink” button.
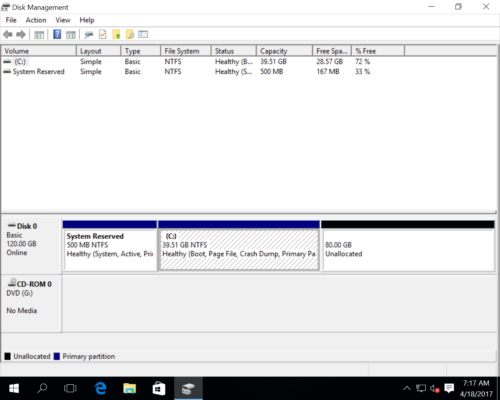
In general, C drive will be shrunk in a short time.
Why cannot shrink C drive with Server 2016 Disk Management
There are 3 common reasons why Disk Management cannot shrink C drive in Windows Server 2016:
- File system error – in that case, the available free space is 0 in the shrinking window.
- Unmovable files – Disk Management cannot shrink volume beyond the point where “unmovable” files are located. These files include Paging page, hibernation and other large files.
- Available free space conflict – maximum available free space will be used by default. If you entered a larger amount or the available free space is reduced a lot before clicking “Shrink” button, you’ll receive error message.
Major shortage to shrink C drive in Server 2016 with Disk Management:
Disk Management can only help you decrease C drive to create new partition. If you want to extend system reserved or other partition, this native is useless. Because the “Shrink Volume” function can only make unallocated space on the right. “Extend Volume” can only extend NTFS partition with adjacent unallocated space. If you shrink C drive with Disk Management, unallocated space is non adjacent to system reserved partition, and it’s on the left of any data partitions.
Shrink C drive with safe partition software
To shrink system partition C: in Windows Server 2016, disk partition software is more powerful. But because of there’s potential system/partition damage risk, you’d better back up in advance and run safe software. Better than other tools, NIUBI Partition Editor has 1-Second Rollback, Virtual Mode, Cancel-at-well and Hot Clone technology to protect system and data.
When shrinking C drive in Windows 2016 server with this tool, you just need to drag and drop on the disk map.
How to shrink C drive in Windows Server 2016 without losing data:
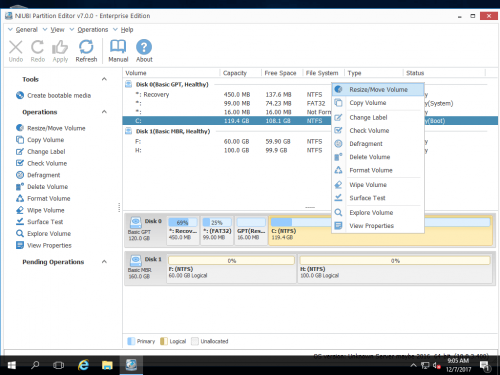
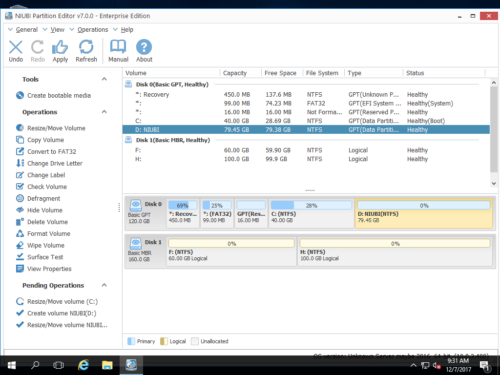
Step 1: Download NIUBI Partition Editor, right click C: drive and select “Resize/Move Volume“.
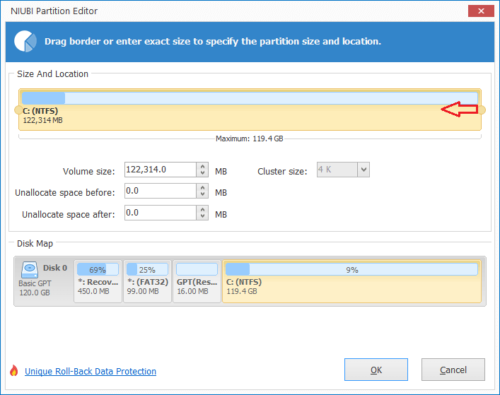
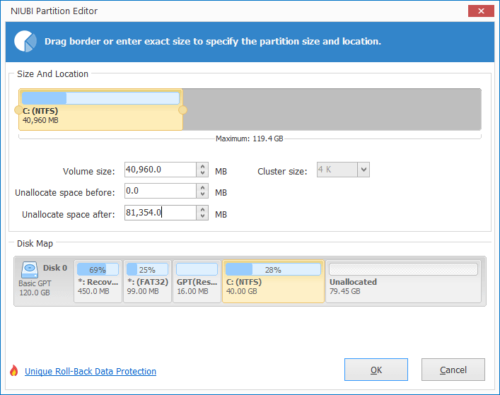
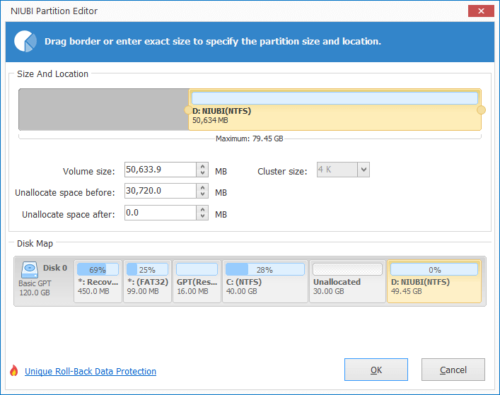
Step 2: In the pop-up window, drag either left or right border to the other side. If you drag right border leftwards, unallocated space will be made on the right side.
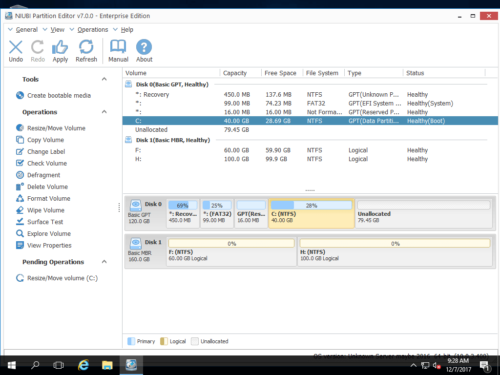
Step 3: Press Apply on top left to execute.
Options after shrinking C: drive
1. Create new volume
Step 1: Right click the unallocated space, and select “Create Volume“.
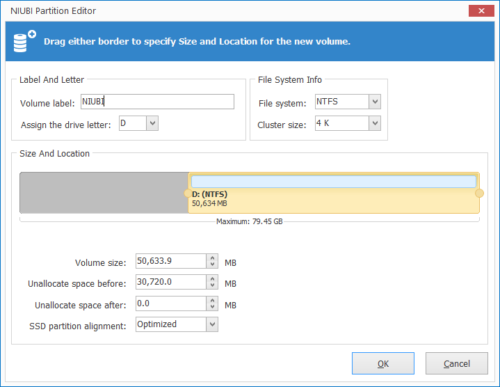
Step 2: Click OK to use all unallocated space with default settings, or change the settings as you wish:
- Add label (name) to the new volume.
- Select a drive letter
- Select file system
- Select cluster size
- If the hard disk is MBR, you can select create new volume as Logical or Primary here.
- Drag either border or input a value to specify partition size and location.
2. Extend other drives
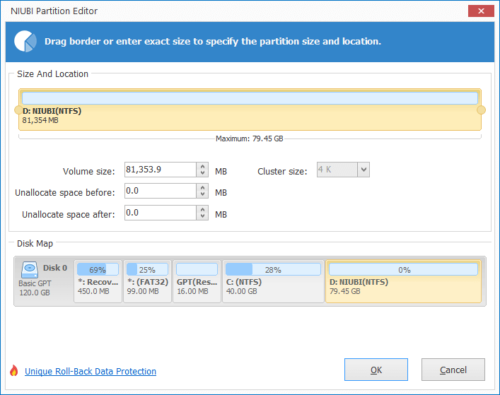
If you want to shrink C drive to extend other volume such as D, make unallocated space on the right when shrinking partition C. Then right click D: and select “Resize/Move Volume“. In the pop up window, drag left border leftwards to combine this Unallocated space.
Click OK and back to the main window, click Apply on top left to execute.
Follow the steps to decrease C drive and extend system reserved partition in Server 2016. Besides shrinking and extending partition, NIUBI Partition Editor helps you do many other disk partition management operations in Windows Server 2003/2008/2012/2016/2019/2022.

