Migrate OS to SSD
How to use Migrate OS to SSD wizard?
Migrate OS to SSD feature is especially designed for users who want to quickly migrate operating system from old hard drive to a new one or SSD without reinstalling Windows operating system and applications.
What is SSD?
A solid-state drive (SSD), sometimes called a solid-state disk or electronic disk. It is a data storage device that uses integrated circuit assemblies as memory to store data persistently. SSD technology uses electronic interfaces compatible with traditional block I/O hard disk drives. SSDs do not employ any moving mechanical components, which distinguishes them from traditional magnetic disks such as hard disk drives (HDDs) or floppy disk, which are electromechanical devices containing spinning disks and movable read/write heads.
Benefits of SSD
- It has s faster reading and writing speed than traditional hard disk.
- It minimizes the chance of data loss due to shaking and knock.
- It has lower power consumption than traditional hard disk.
- There is no noise when it works.
- It can work under a large range of temperature (most from -10 to 70℃) than tradition disk (5 to 55 ℃).
- It is lightweight and is easy to carry.
Since SSD provides a faster processing speed over regular hard drives, it is a better choice to set SSD as system disk to get better performance and decrease boot time. With Migrate OS to SSD feature, you can migrate Operating System and data from old hardware without reinstalling or reconfiguration, saving much of your precious time.
How to use Migrate OS to SSD?
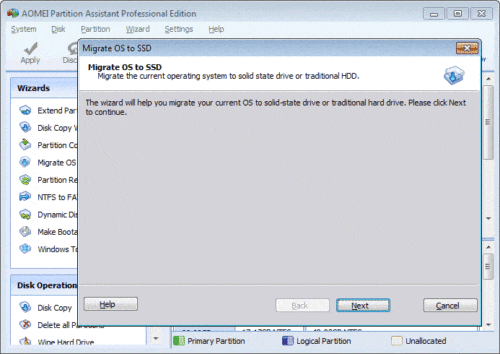
Launch the program, click “Migrate OS to SSD or HDD” on top left “Wizards” panel. In the pop-up window, click “Next” to continue.
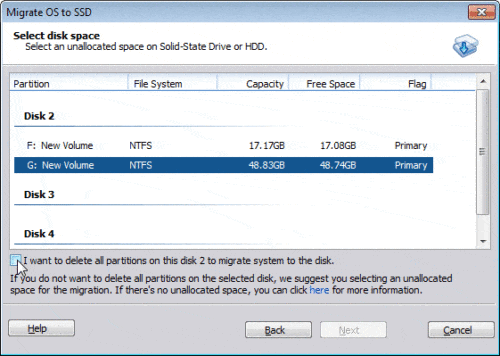
In the next window, select a partition or an unallocated space on the destination disk (either SSD or traditional HDD), and then click “Next”.
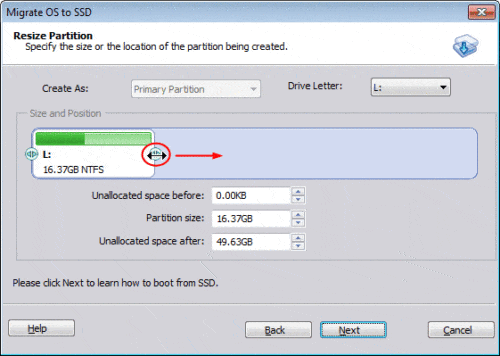
Click Next, in next window, you can keep default settings or modify the target disk partition details (including size, location, and drive letter). To change the partition size, you may drag left or right border or specify the partition size directly.
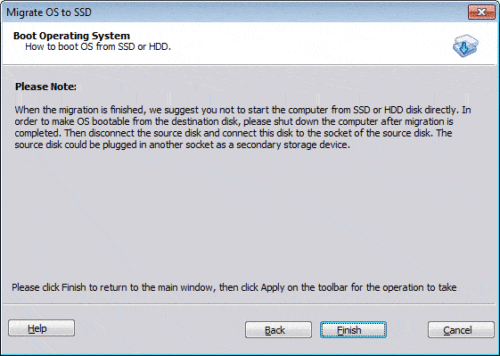
Click Next and read the note about “Boot Operating System”.
Click “Finish” and back to main window, press “Apply” button on top left to proceed, please tick the option to shut down computer after you press this button.
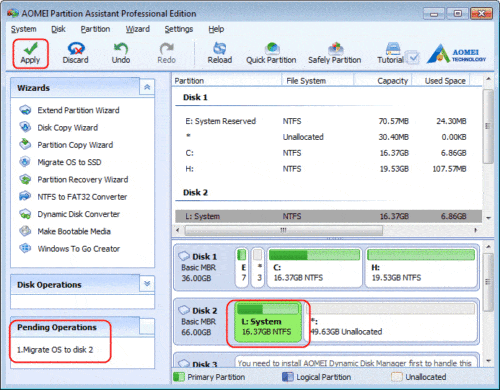
Note:
This operation involves the system partition, so the operation requires reboot to proceed.
If you migrate OS between MBR and GPT disks, please enter BIOS and change boot setting (about boot setting, please check your motherboard or computer manual) when OS migration is completed.
- How to reallocate free space
- How to resize partition
- How to move partition
- How to merge partition
- How to split partition
- How to convert Logical partition to Primary
- How to convert Primary partition to Logical
- How to convert between MBR and GPT
- How to change partition type ID
- How to change serial number
- How to rebuild MBR
- How to align partition

